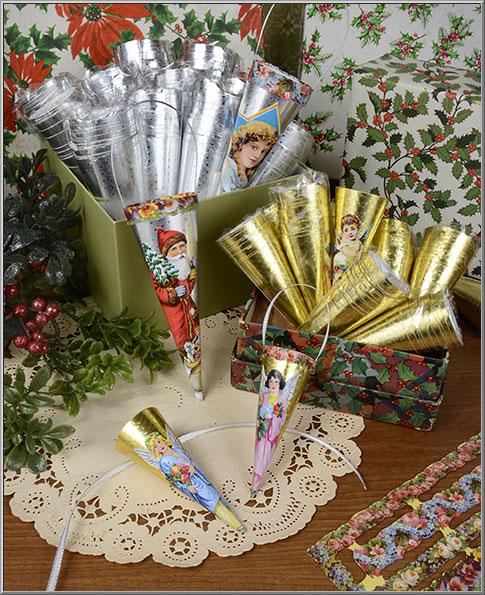
1990 Old Stock from our Archives
Silver and Gold Paper Foil Craft Cones from Denmark
Create your own festive cornucopia ornaments with our
step-by-step instructions - suitable for all skill levels
What could be more thoughtful than to present
your loved ones with a pretty handmade token
of affection? These foil paper cones will hold
candy or small gifts, and can then be enjoyed
as keepsake ornaments on a Christmas tree.
Handmade from embossed, shiny paper foil, each piece was individually rolled by hand
into a cone shape, then fastened in the back with two small metal staples. Please note
that the
cones may vary in form slightly due to the nature of their manufacture.
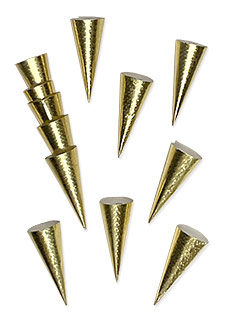
Gold cones are 3½" high - patterned paper has an etched design
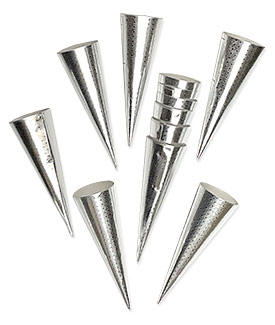
Silver cones are 5¼" high - patterned paper has a stars design
We purchased these nifty paper foil cones
from a Danish family-run company way back
in January 1990. We've kept them stored in
airtight plastic bins since then, so that the 35
year old cones still
look fresh and like new.
Ornament & Party Favor Cornucopias
Step-by-step crafting instructions
• Scissors for fine work
• Tacky white glue
• Straight edge ruler
• Brush for applying glue
1) Ribbon hangers: for the small gold cones
we used a 5-1/2" long ribbon; the ribbon for
large silver cones is 7" long. The best width
of ribbon to use is 1/8" up to 1/4" wide.
2) The cornucopia ornament is created using
two cones; choose a pair that fit together well.
The first step is to position the staples in back,
then carefully squeeze the "inner" cone at the
top to make an oval opening. This is an easy
way to determine the ideal spot on the left and
right side of the cone where you should glue
on the ribbon hanger.
Measure 1/4" down from the top on the left
side of the cone; then glue down one end of
the ribbon on the outside of the cone. Finish
the hanger by attaching the other end of the
ribbon 1/4" down on the opposite side of the
cone, also on the outside.
3) To complete your cornucopia ornament,
add a few light dabs of a tacky glue to the
inside of the "outer" cone. Hold this cone so
that the staples are in the back, then set in
the prepared "inner" cone with the ribbon
hanger
and gently, but firmly, press it down
into place so the top edges nearly meet.
The ribbon handle will now be held securely
in place, and the finished ornament will have
a neat, clean look. For the final step, paint a
line of glue underneath the loose edge of the
flap
inside the cone to hold it down in place.
4) Now that your cones are ready to trim,
you can decorate them to make charming
party favors for birthday parties, weddings
and baby showers or to use as cornucopia
ornaments for Christmas, Easter, or even
Halloween!
We offer a nostalgic selection of scrap relief
pictures for decorating your own cornucopia
ornaments, while our collection of Dresdens
includes fanciful vintage embellishments.
Special Value Summer Sale for Crafters - Save 30% off!
Old stock from our archives, only limited quantities are
available of these 35-year-old paper foil cones.
Set of 12 - Made in Denmark
3½" high by 1¼" wide
Set of 12 - Made in Denmark
5¼" high by 1¾" wide
Gold #CRF090
Reg. $6.00 set
Sold Out
Silver #CRF091
Reg. $7.50 set
Sale! $5.25