< Previous | 1 | 2 | 3 | Next >
© Copyright 2008, D. Blümchen & Company, Inc.
All rights reserved.
Step-by-Step Crafting Instructions for our

Our easy-to-craft card is wonderful because it can be customized to suit any holiday or celebration. This lacy, fold-out card makes a very lovely St. Valentine's Day card, Mother's Day greeting card, and even a Victorian-style Christmas card. It is especially nice to create one-of-a-kind cards to use for very special occasions such as weddings, birth announcements, anniversaries, birthdays and also as invitations to baby showers, wedding showers or any special event party.
4 3/4" Card ~ 8" square doily, 7 3/8" square liner paper and a 4 1/2" cardboard square
6" Card ~ 10" square doily, 9 1/8" square liner paper and a 5 5/8" cardboard square
7 3/8" Card ~ 12" square doily, 11" square liner paper and a 6 3/4" cardboard square
We offer three sizes of square doilies for crafting our Victorian-style paper lace cards ~
listed below are the measurements for the paper supplies used to create each size card

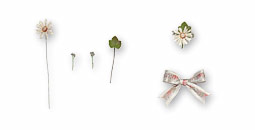
When decorating the card, do let your imagination be your guide. For instance, wouldn't it be stylish to co-ordinate your card to a present? Just use the same ribbon and gift wrap to create your card, and your present will be "the belle of the ball"! And if you can't find a pretty enclosure card for a check, gift certificate or gift card, now you can create the most memorable gift card enclosure ever.

Fancy Paper Lace Fold-Over ~ Victorian Greeting Card

Create a Beautiful Card for any Holiday or Special Occasion
Need a pretty envelope? Just
follow steps 1, 2 and 3, then
glue the folded corners shut.

Step 1
• For this project you will need 3 paper pieces to
create the card: an 8" square doily, a piece of liner
paper that measures 7 3/8" square, and a piece of
cardboard which is cut to a 4 3/8" square.
• You can use almost any type of paper for the liner,
but the card folds better with thinner weight paper.
• Clean up the paper lace doily so that the design is
nice and crisp by trimming out any of the cut-out bits
which are still filling in the die-cut tracery design. A
pair of small, finely-pointed scissors or embroidery
scissors is great for this task.
Step 2

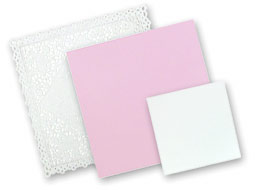
• Attach the liner paper to the back of the doily. We
used a glue stick and gently dabbed it up and down
on the die-cut sections so as not to tear the delicate
tracery designs of the paper lace doily. Spray glue
can also be used, but be careful to cover the outer
frilled edges of the doily to keep them clean.
• Position the liner paper so that it is centered evenly
within the doily square; press down to secure.
• We added a thin line of white glue to the underside
edges of the liner paper to make sure that the liner
is firmly attached to the doily and won't come loose.


Crafting Instructions for our Victorian-Style Paper Lace Card ~ Steps 1-8
To purchase the craft supplies used in the creation of this card, please click here >

Craft Project 0805a
Page 1 ~ 2 ~ 3
· Blümchen Holiday Herald ·
Step 3

• Trim the outer edges of the inner liner paper using
a decorative border. This will make the liner paper
edges neater and will give the finished card a more
professional look. We used a pretty silver Dresden
foil paper border, and attached it using white glue.
Make sure that the Dresden trim border is securely
glued down. Because this is a fold-open card, you
want to be sure that the trim won't pull up from the
inner liner when the card is opened and closed.

Step 4

• You are now ready to fold the card. Position the
card so that a corner point faces up. This doily was
made with a square center section which serves as
a guide for where each of the folds should be made.
First, fold over the right corner into the center of the
card, being careful to make the fold nice and straight.
The second fold is to bring the left corner point into
the center of the card. Third is to fold up the bottom
corner and fourth, fold down the top point.


Step 5
• In this step you will be decorating the square card-
board insert. We used the same pretty ribbon trim
which was also used to make the bow for the front
of the card, but you can use anything from Dresden
borders to paper lace to scrap picture trims.
• The decorated square inner card can be designed
with a space left blank so that you will have an area
to write a special sentiment by hand. Or, if you have
a word processing program, you can print out your
own customized message in a fancy font.
Step 6
• Carefully glue the decorated cardboard square to
the inside center of the paper lace card, making sure
that the piece is positioned evenly within the folded
lines which delineate the square central section of
the card.
• We used a thin coating of white glue to attach the
pre-decorated cardboard square to the inside of the
card. Our artists prefer white glue because it gives
you the ability to shift the cardboard so that it can be
positioned evenly in place.

Step 7
• You are now ready to decorate the outside top
flap of the outer "envelope" of the card. First, we
edged the top flap using the same silver Dresden
border trim which was used inside the card. Next,
we made a matching bow using the ribbon which
edges the decorated inside card. And to make the
card really charming, we created a small nosegay
using a vintage fabric flower, green ivy leaf, and
two small bunches of flower stamen buds.
Step 8
• At the very point of the top flap, we pasted on a
Dresden trim "spot" before any other decorations
were added. This serves to strengthen that point
and gives the card a more finished appearance.
• The final step is to decorate the top front flap of
the card. If you like, you can add additional trims to
the other three flaps, such as die-cut scrap picture
flowers or fancy Dresden trims, to customize your
card and make it extra sweet!
Home  |  Shipping Information  |  View Shopping Basket  |  Customer Service  |  Contact Us
E-mail Newsletter  |  Catalog  |  Site Directory  |  Privacy & Security  |  Terms of Use
© Copyright 2008 ~ D. Blümchen & Company, Inc. ~ 1-866-OLD-XMAS ~ All Rights Reserved